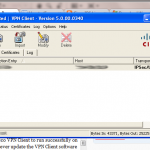
 For about the past six months, I’ve been trying on and off to get Cisco VPN Client to run successfully on my computer. As you may or may not know, Cisco has no plans to ever update the VPN Client software to work on 64-bit Windows systems. Instead, Cisco chooses to strong-arm its clients into purchasing a Cisco AnyConnect. AnyConnect, from what I can tell (I am by no means an expert, so please forgive me if I’m wrong), is a new VPN server that deploys its own client whenever someone connects to it. The catch is, of course, that the entire network needs to be updated and reimplemented in order to use AnyConnect; it’s not something that one or two users can do on their own computers.
Since AnyConnect didn’t look like a viable option in my case (after all, there are only about 5 of us using 64-bit systems, and the current VPN setup works pretty well for everyone else that’s using it), I started looking for other solutions.
I started Googling and found a few different possible solutions. Some of the articles indicated that the VPN client should be run inside of XP Mode. That basically boils down to the following steps:
- Download and install Windows XP mode for Windows 7.
- Open Windows XP Mode and install the VPN Client inside of the virtual machine (VM).
- Change the XP VM’s settings to use your network adapter rather than a virtualized network adapter (not sure if this step is necessary or not).
- To do this, open Windows VirtualPC by navigating to it in your start menu.
- Then, right-click on the Windows XP Mode virtual machine file (Windows XP Mode.vmcx) and choose Settings from the context menu.
- Select the “Networking” menu item from the left column.
- In the dropdown menu for Adapter 1, choose your network adapter rather than the default of “Shared Networking (NAT)”.
I did that, and it worked great. Unfortunately, however, I couldn’t seem to access any of my network shares once I had the VPN client up and running and got connected to my employer’s VPN.
Although XP Mode is supposed to be fairly seamlessly integrated with the rest of Windows 7, and all of your files, etc. are available between the two operating systems, it seems that the VPN connection is not shared from the XP virtual machine to the host operating system.
Therefore, I found that, once I had the VPN connection established, I needed to somehow open the XP file explorer to access my network drives. Since XP mode doesn’t offer a separate file explorer utility that can be opened from the Windows 7 start menu, this posed a bit of a problem.
I had two choices. I could either actually open Windows XP Mode, log into the VM and use the VPN Client inside of that window, or I could figure out a way to open an XP file explorer utility. After fumbling around a bit, I figured out that the Cisco VPN Client “help” documents open in Internet Explorer. To do that, it launches Internet Explorer 6 from the XP Mode VM.
Since Internet Explorer and Windows File Explorer are the same basic utility, you can use IE6 to connect to your network drives by simply typing the address of those network drives in the IE6 address bar. You will most likely need the IP addresses to your network drives, as (at least in my case), the network share names are not recognized.
To open IE6 in XP Mode, simply go to the VPN Client’s “Help” menu and select “Help VPN Client” from the menu. A new IE6 window will then open.
Another option you have is to set Cisco VPN Client to automatically open an application when you connect. To do that, open the VPN Client, go to the Options menu and select “Application Launcher.” Then, check the checkbox next to “Enable” and then click the “Browse” button. A file browser window will then open in XP Mode. You can then navigate to C:\Windows\ and choose “explorer.exe”
Once you do that, a new file explorer window will open each time you initiate a VPN connection.
Once you get your network drive opened in the file explorer, I would recommend finding the files on which you want to work, and then copy them from that explorer window into a location on your local computer.
3 Responses
Have you tried using OpenVPN for this? I just installed the latest version on Windows 7 and it worked immediately for me….
i want https://www.htmlcenter.com/blog/run-cisco-vpn-client-in-64-bit-windows-7/
i want cisco vpn so plz